Everything you need to make a clear tutorial or explainer.
Plan it, record it, edit it and export it, all in your browser. Here’s every feature, with real screens from the app.
Plan the video before you record it.
Every project has tabs for your plan, your research and your script, right next to the editor. Work out what to say first, and the recording takes one try instead of five.
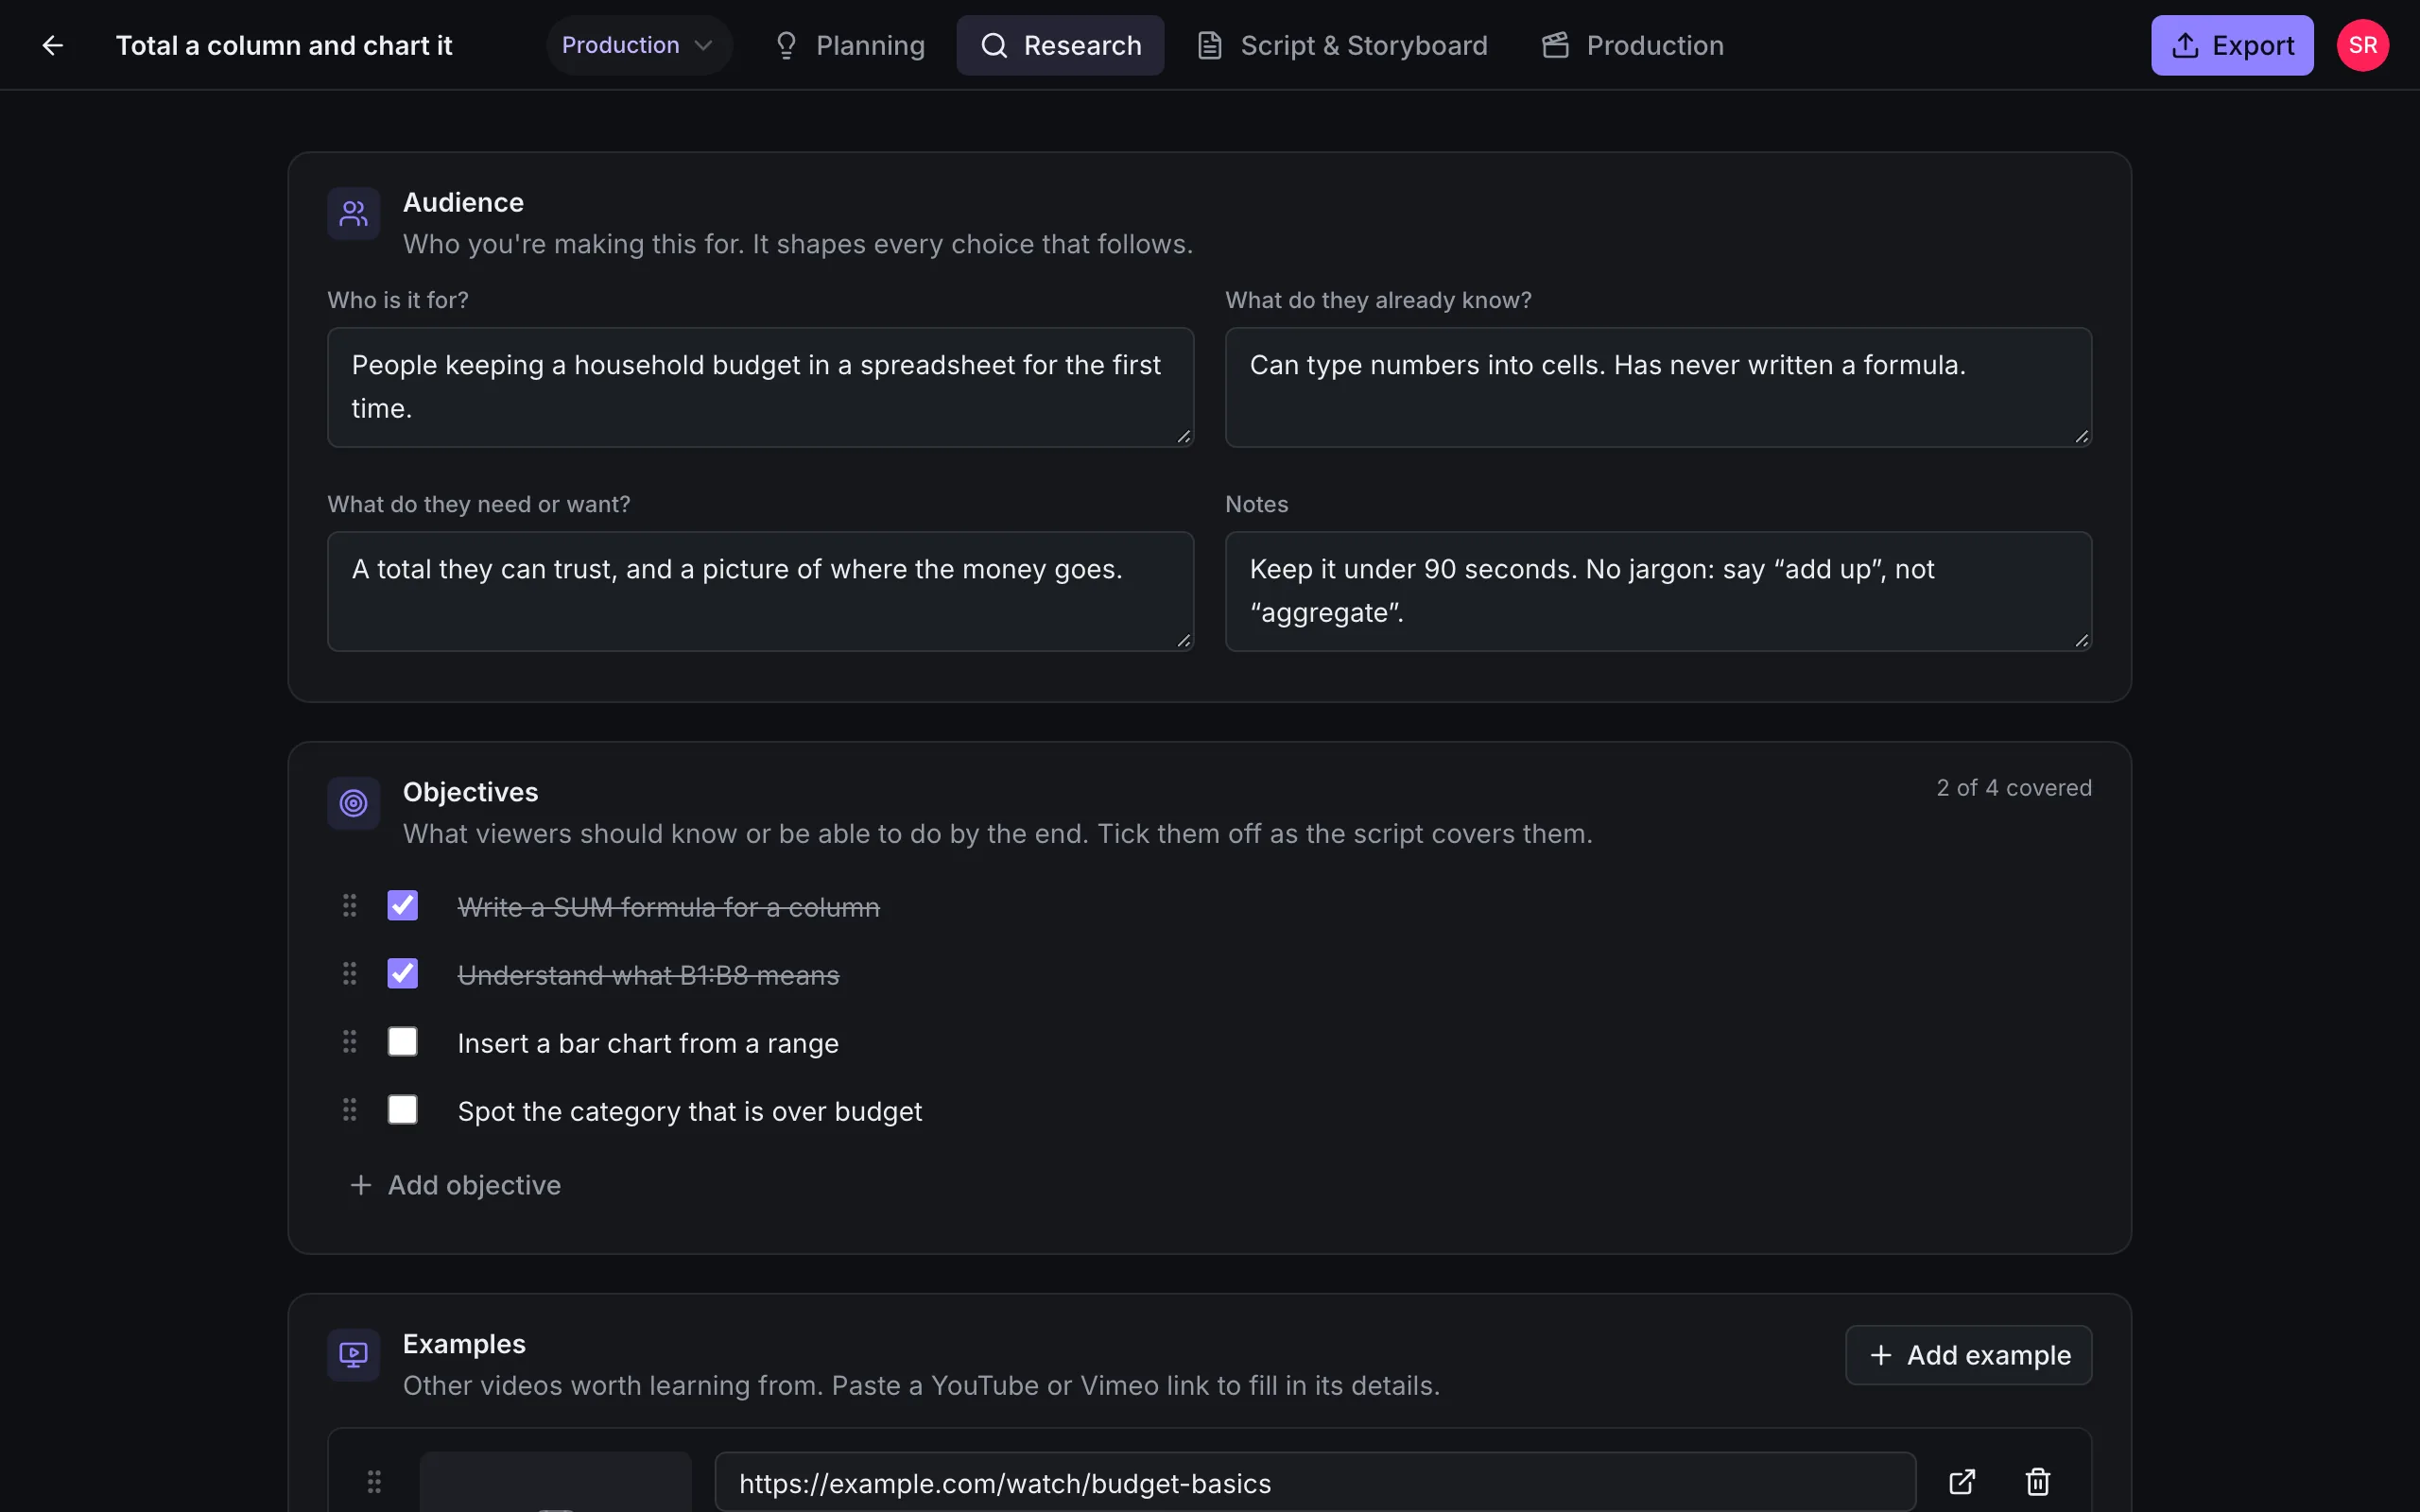
Idea, topic and format
Story, teach, explain or demonstrate. Choosing one up front shapes everything after it.
Audience
Who it’s for, what they already know and what gets in their way.
Example videos
Paste a link and get the title and thumbnail. Add quotes, a summary and your takeaways.
Sources with accuracy
Mark each one verified, likely, unverified or disputed, so you know what you can say.
Objectives
What viewers should be able to do afterwards, as a checklist you can reorder.
Script & storyboard
A hook, an outline, and segments with narration, visual notes, estimated length and a frame from your library.
Record your screen and voice in the same tab.
No separate recorder to install. Your recording is saved to the project and placed on the timeline, ready to edit. Already have footage? Drag it in.
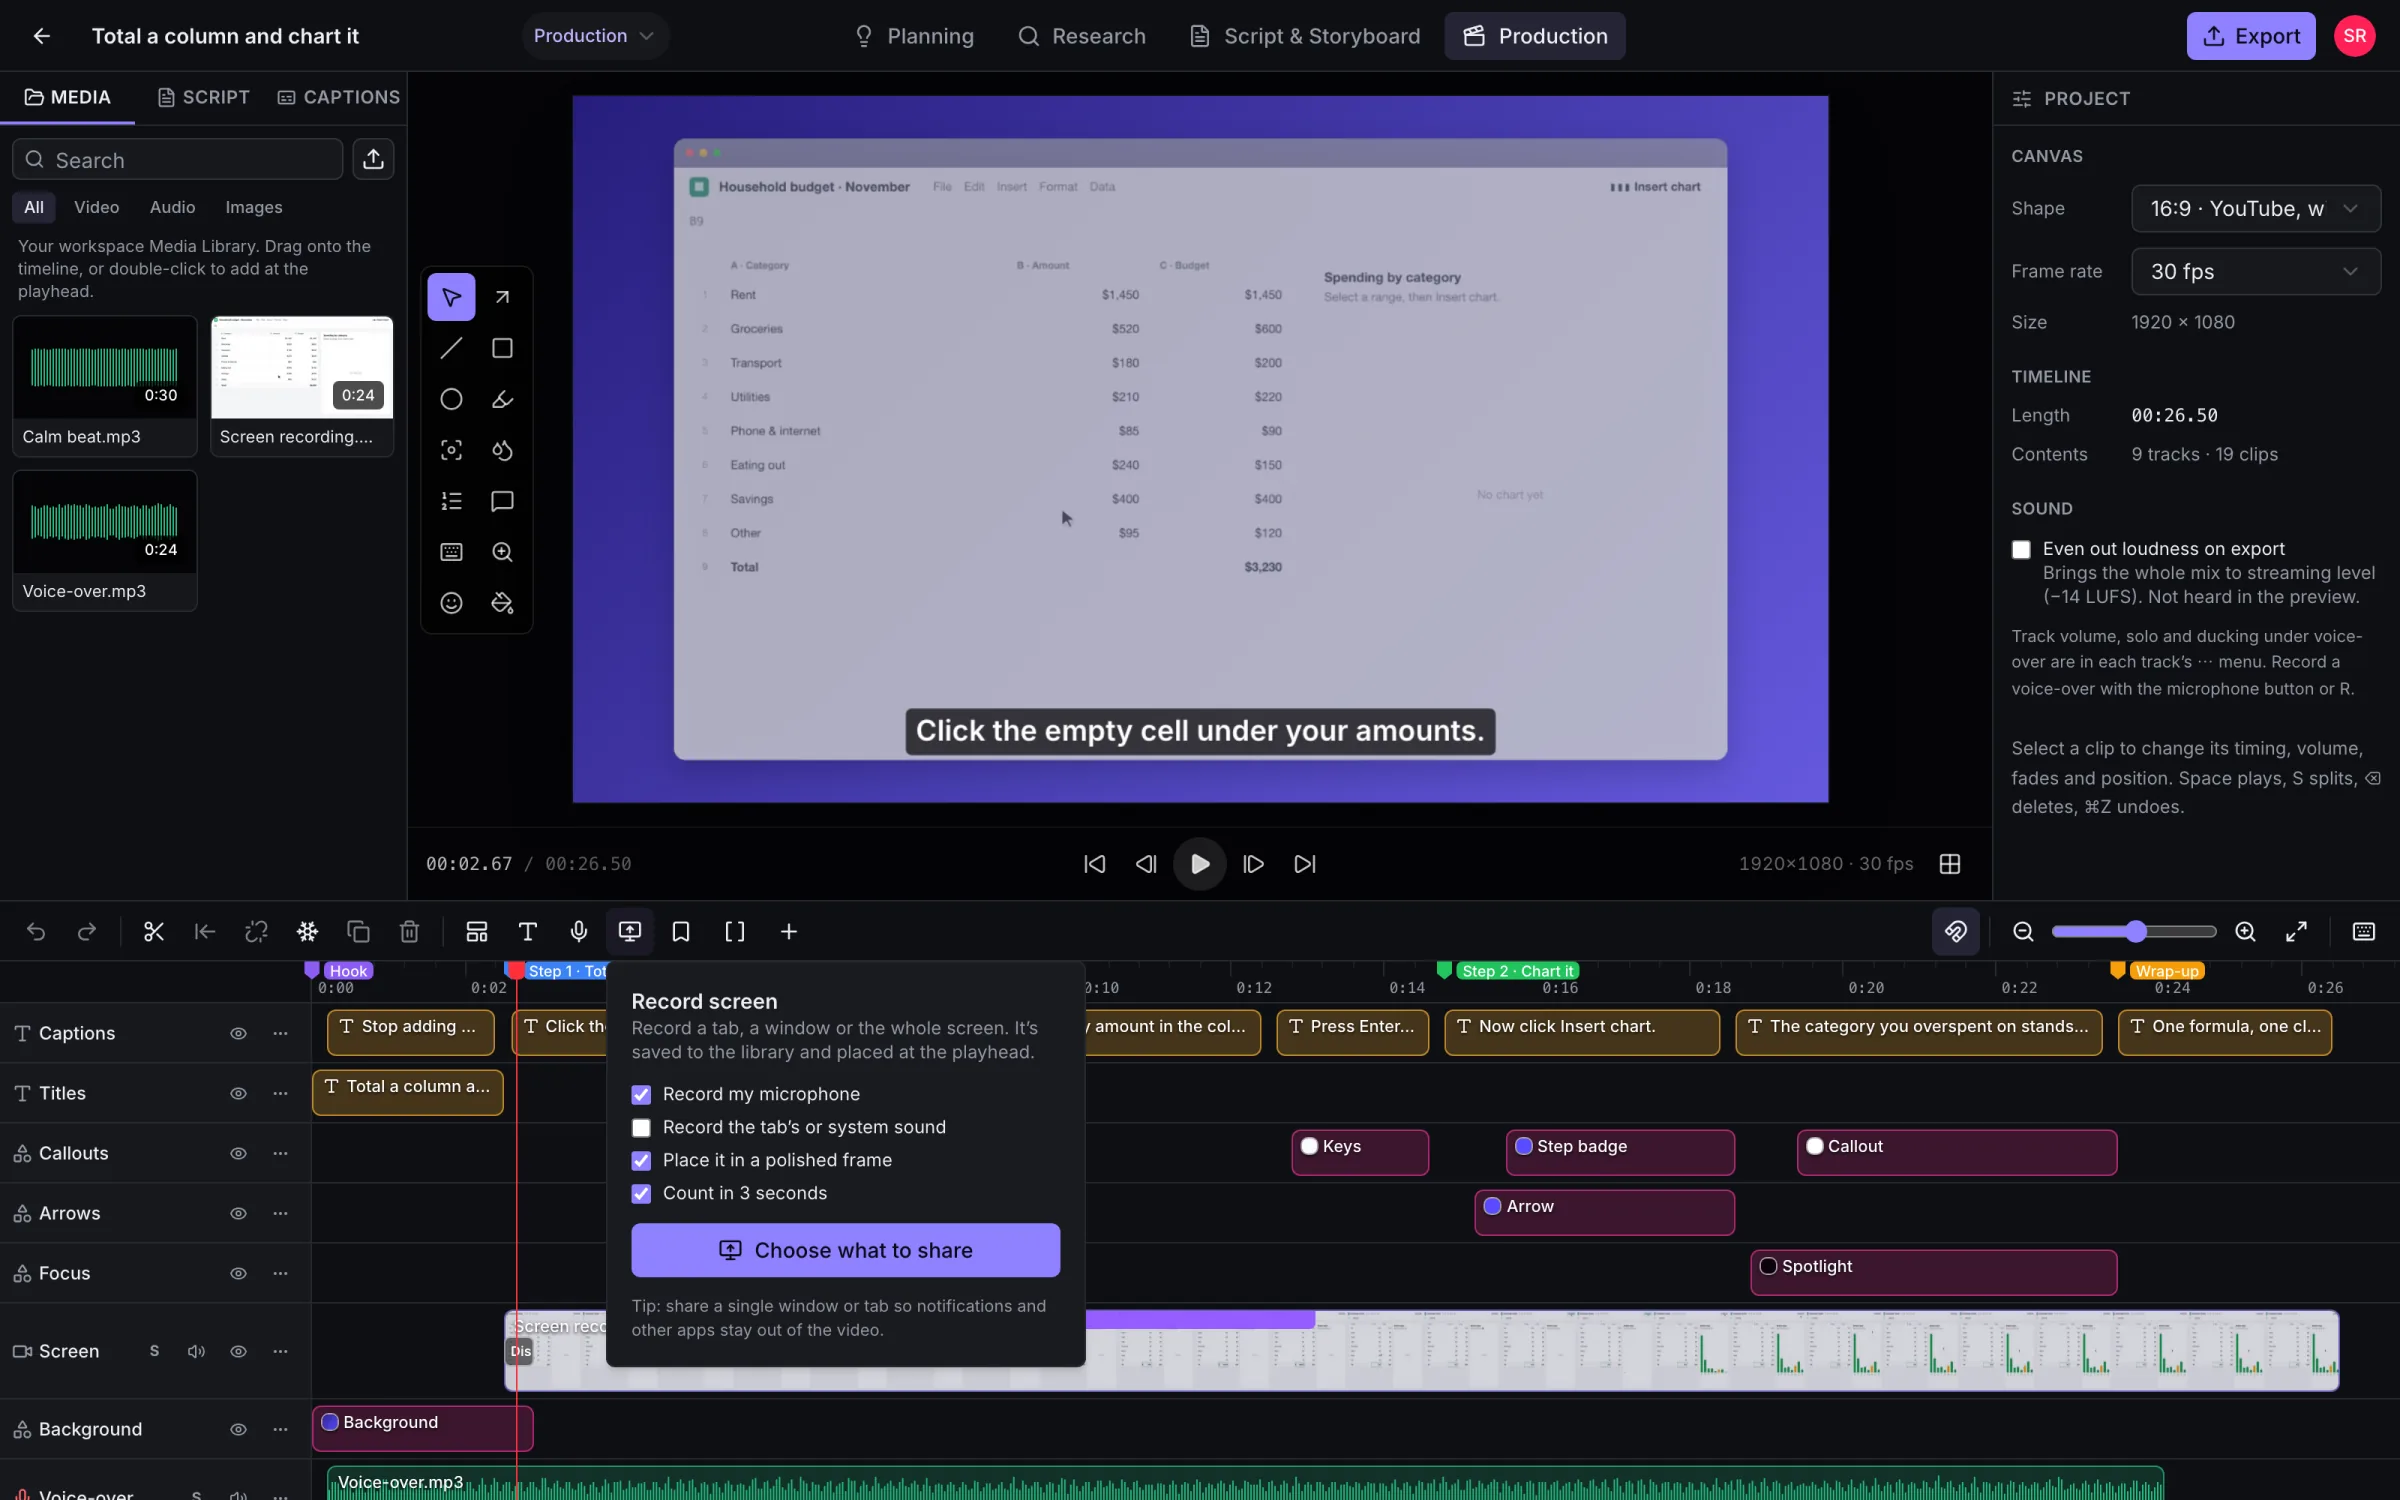
Screen recording
A tab, a window or the whole screen, with a countdown and a stop button.
Microphone and system audio
Pick your mic, and include the tab’s or system’s sound when you need it.
Voice-over at the playhead
Press R, talk over the picture, press Space to stop. Other tracks duck under you.
Media library
Upload video, audio and images by dragging them in. Folders, search, filters and previews.
Live processing
Thumbnails, filmstrips, waveforms and smooth preview copies appear as soon as they’re ready.
Big files welcome
Large uploads go straight to storage in parts, so a long recording doesn’t stall.
A full video editor that stays simple.
Cut, arrange and animate on a timeline with as many tracks as you need. Everything can be undone, and your work saves as you go.
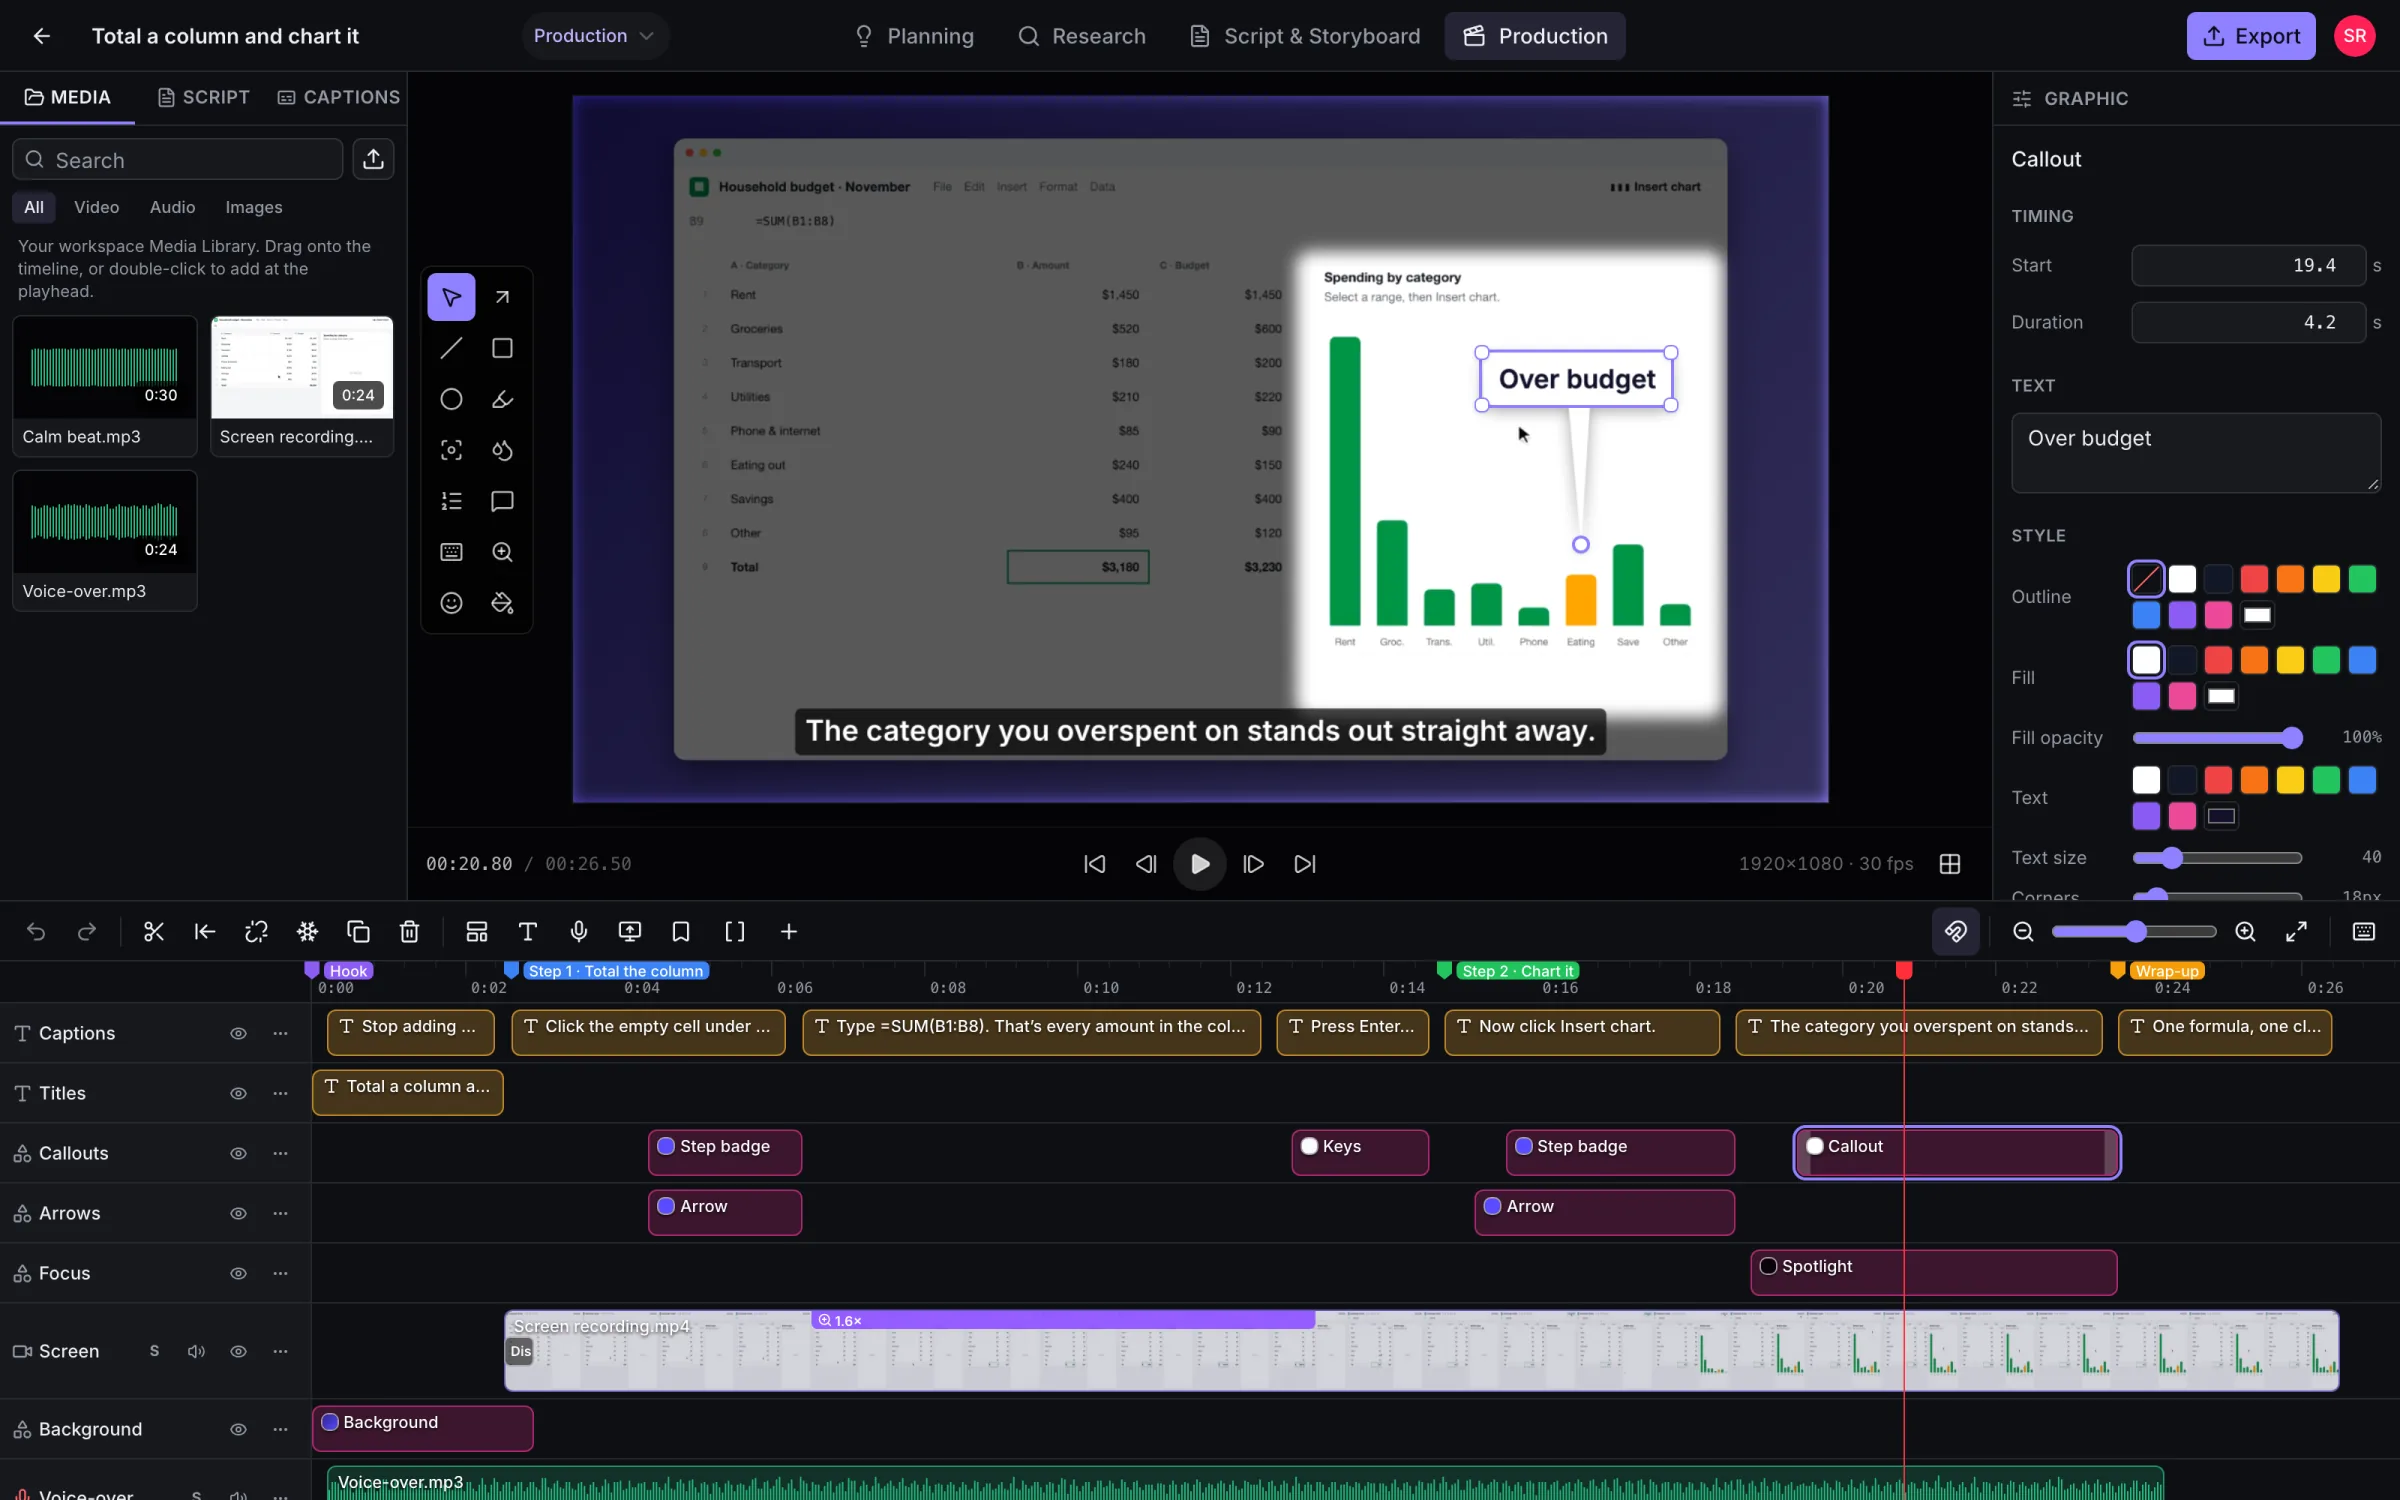
Trim, split, ripple
Split at the playhead, ripple delete, close gaps, slip, nudge and duplicate.
Keyframes
Animate position, scale, rotation and opacity. Move, resize and crop right on the preview.
Transitions
Dissolve, dip to black or white, and wipes and slides in four directions.
Speed
Speed up, slow down, reverse, or hold a frame for two seconds with F.
Colour
Looks like Vivid, Warm, Cool, B&W, Faded and Moody, plus manual adjustments and blur fill.
Text
Presets for titles, lower thirds, captions, quotes and labels, with outlines and in/out animations.
Show viewers exactly where to look.
Pick a tool and drag on the picture. Each arrow, box or label appears on the timeline, so you choose exactly when it shows up and how it animates.
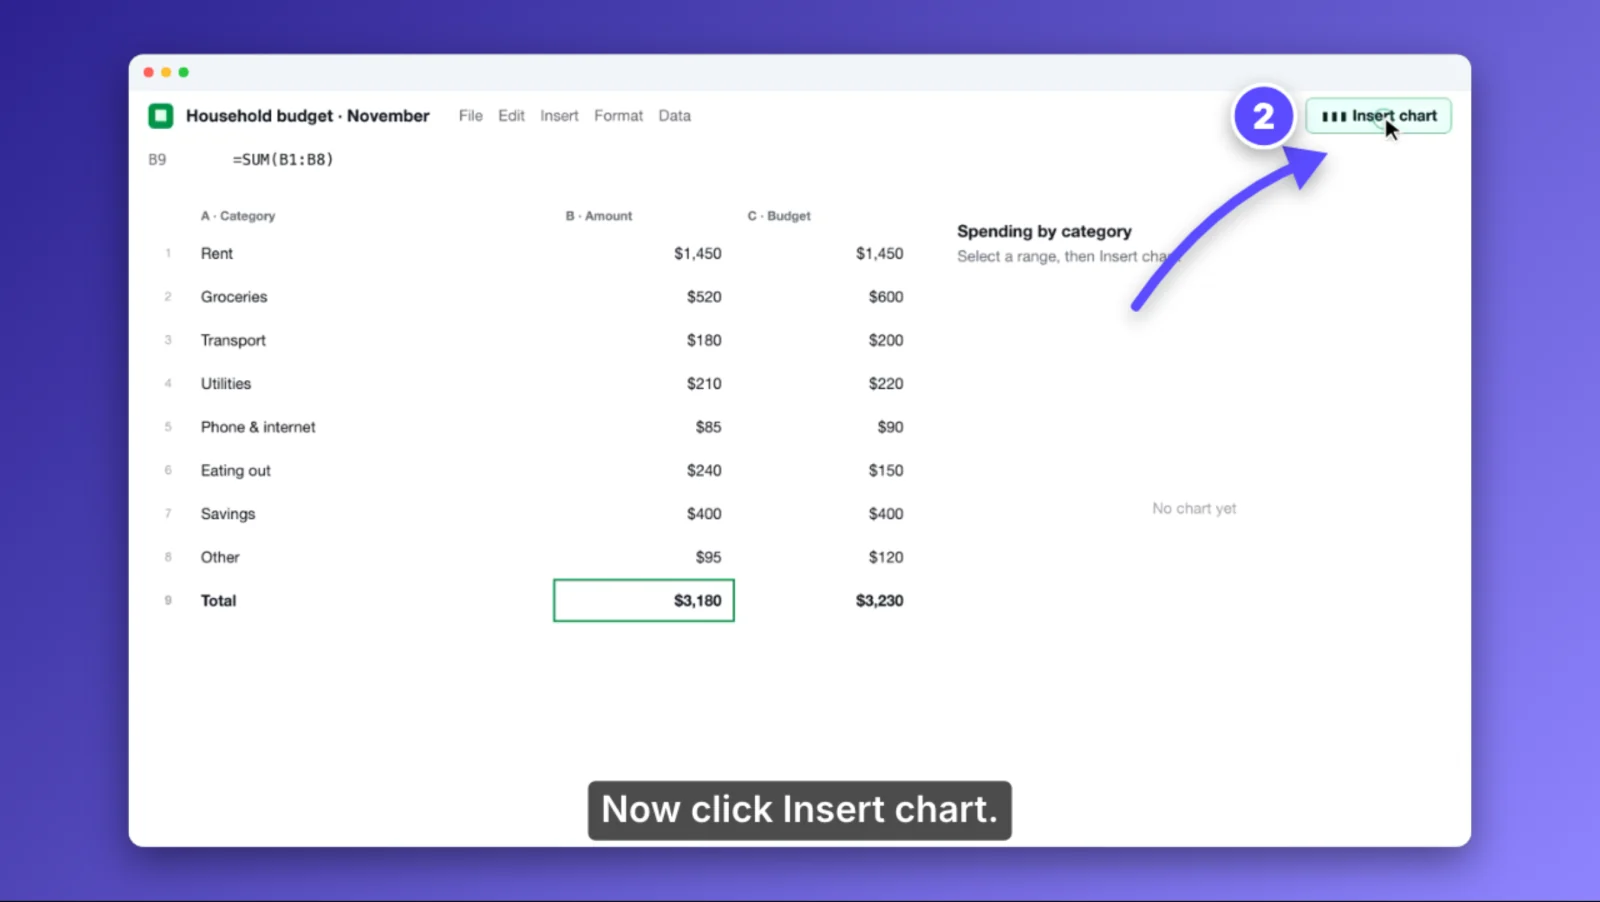
Arrows and lines
Straight or curved, with head styles, dashes and a draw-on animation.
Shapes
Rectangles and ellipses with outline, fill, corner radius and shadow.
Highlight and spotlight
A marker box over text, or dim everything except what matters.
Blur and pixelate
Hide a region of whatever is underneath, and keyframe it to follow scrolling content.
Step badges
Numbered circles that number themselves as you add them.
Callouts and keys
Labels with a pointer, and keyboard-shortcut chips like ⌘ ⇧ K.
Make recordings easy to follow and good to look at.
Zoom into small details, frame your recording nicely, and build title cards and step-by-step scenes without a design tool.
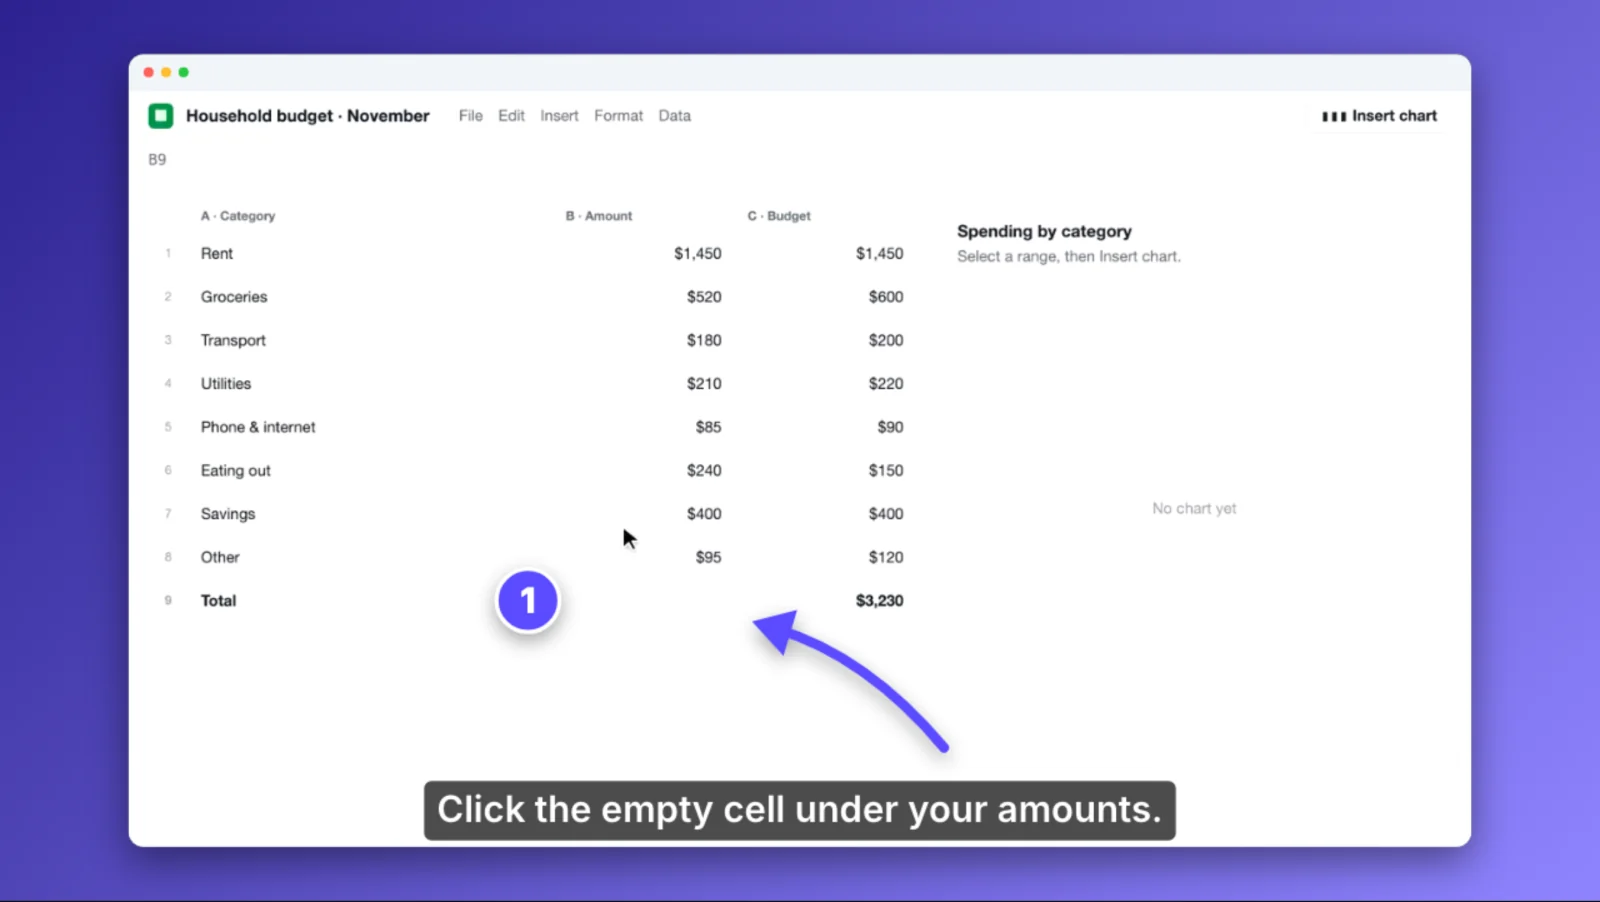
Zoom & pan
Press Z and drag a box. The zoom eases in, holds and eases out, and shows on the clip.
Polished frame
Background, padding, rounded corners, shadow and a browser-window frame, adjustable after recording.
Framed screenshots
Drop a screenshot from the library and place it with a frame, shadow and pop-in.
Scene templates
Title card, bullet list, numbered steps, before/after, quote and outro.
Icons
A searchable icon library. Recolour and resize without losing sharpness.
Backgrounds
Solid colours, gradient presets or a library image, across the whole video or one scene.
Clear sound and captions, without another app.
Record a voice-over, keep music under your voice, and turn your script into captions viewers can read on a phone.
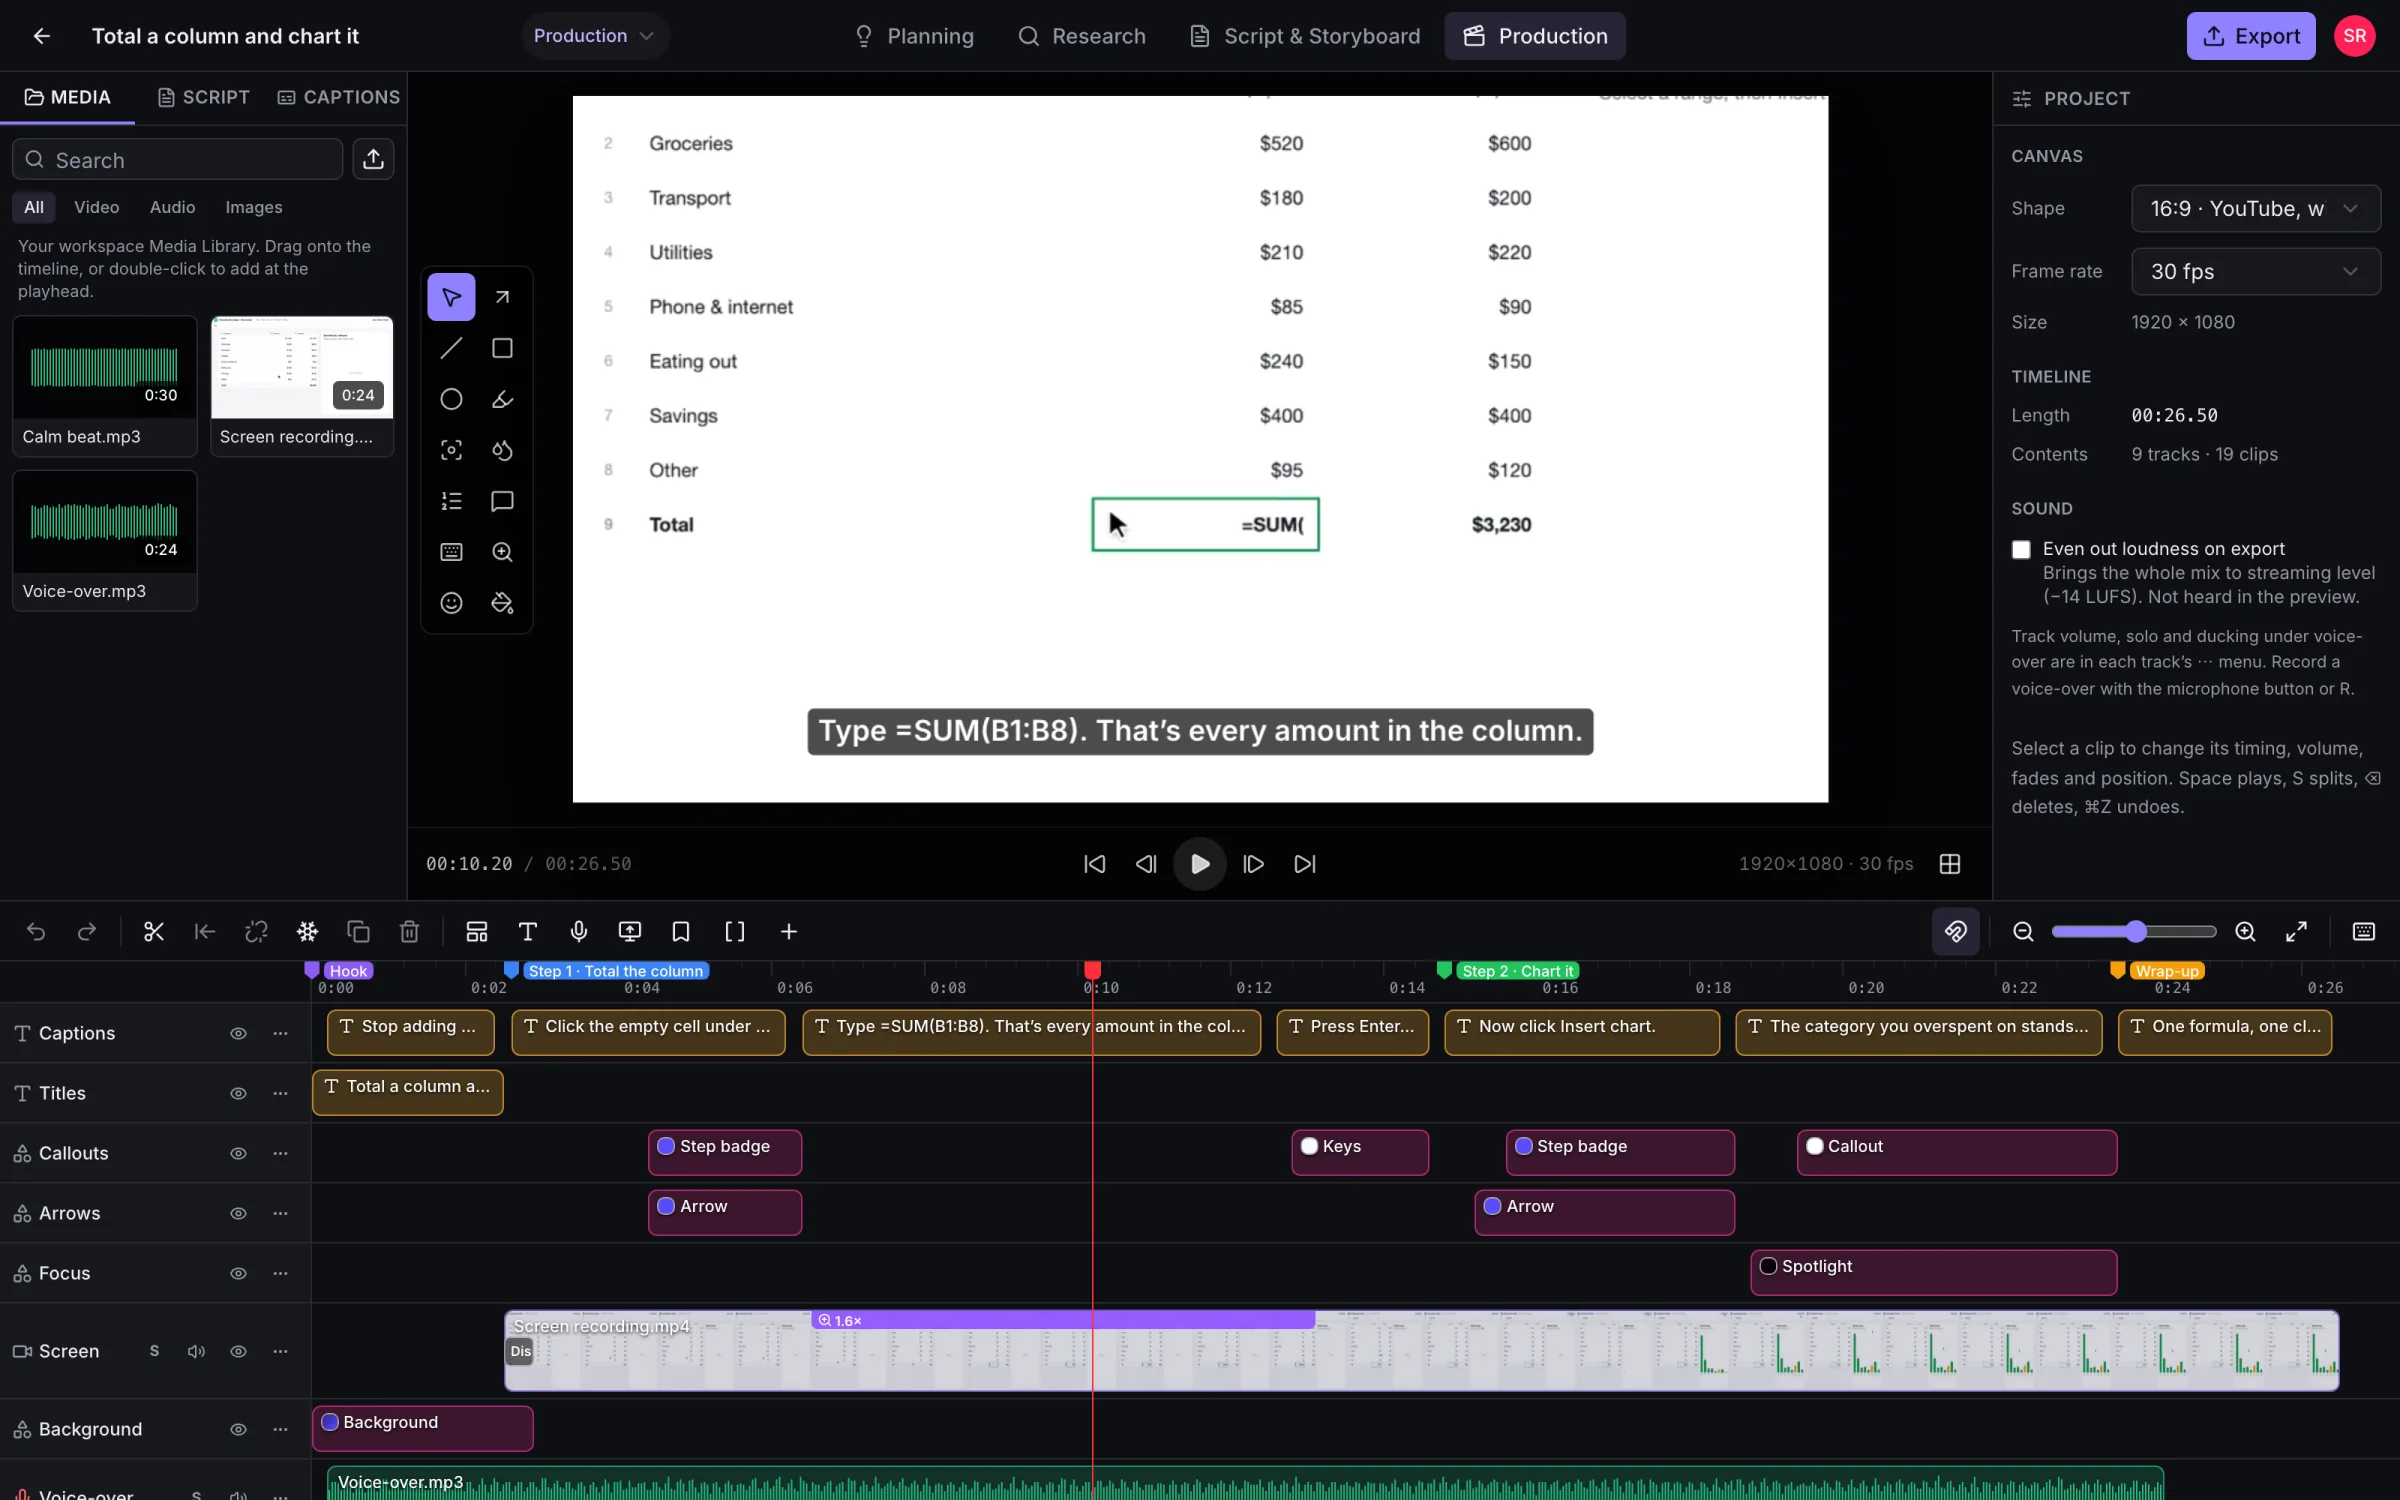
Mixing
Track volume, mute and solo, clip fades and crossfades.
Ducking
Music and other sound dip under your voice-over automatically, by an amount you choose.
Loudness
Normalise the export to −14 LUFS, the level streaming sites play at.
Caption files
Import SRT or WebVTT, or export your captions for YouTube.
Script to timeline
Lay out your script as markers and narration text, timed by how long it takes to say.
Readable lines
Captions wrap at 42 characters per line and use a legible caption preset.
Export for YouTube, Shorts or 4K, without tying up your laptop.
Pick a format and your video renders on our servers. Watch the progress, or close the tab and come back to a finished file.
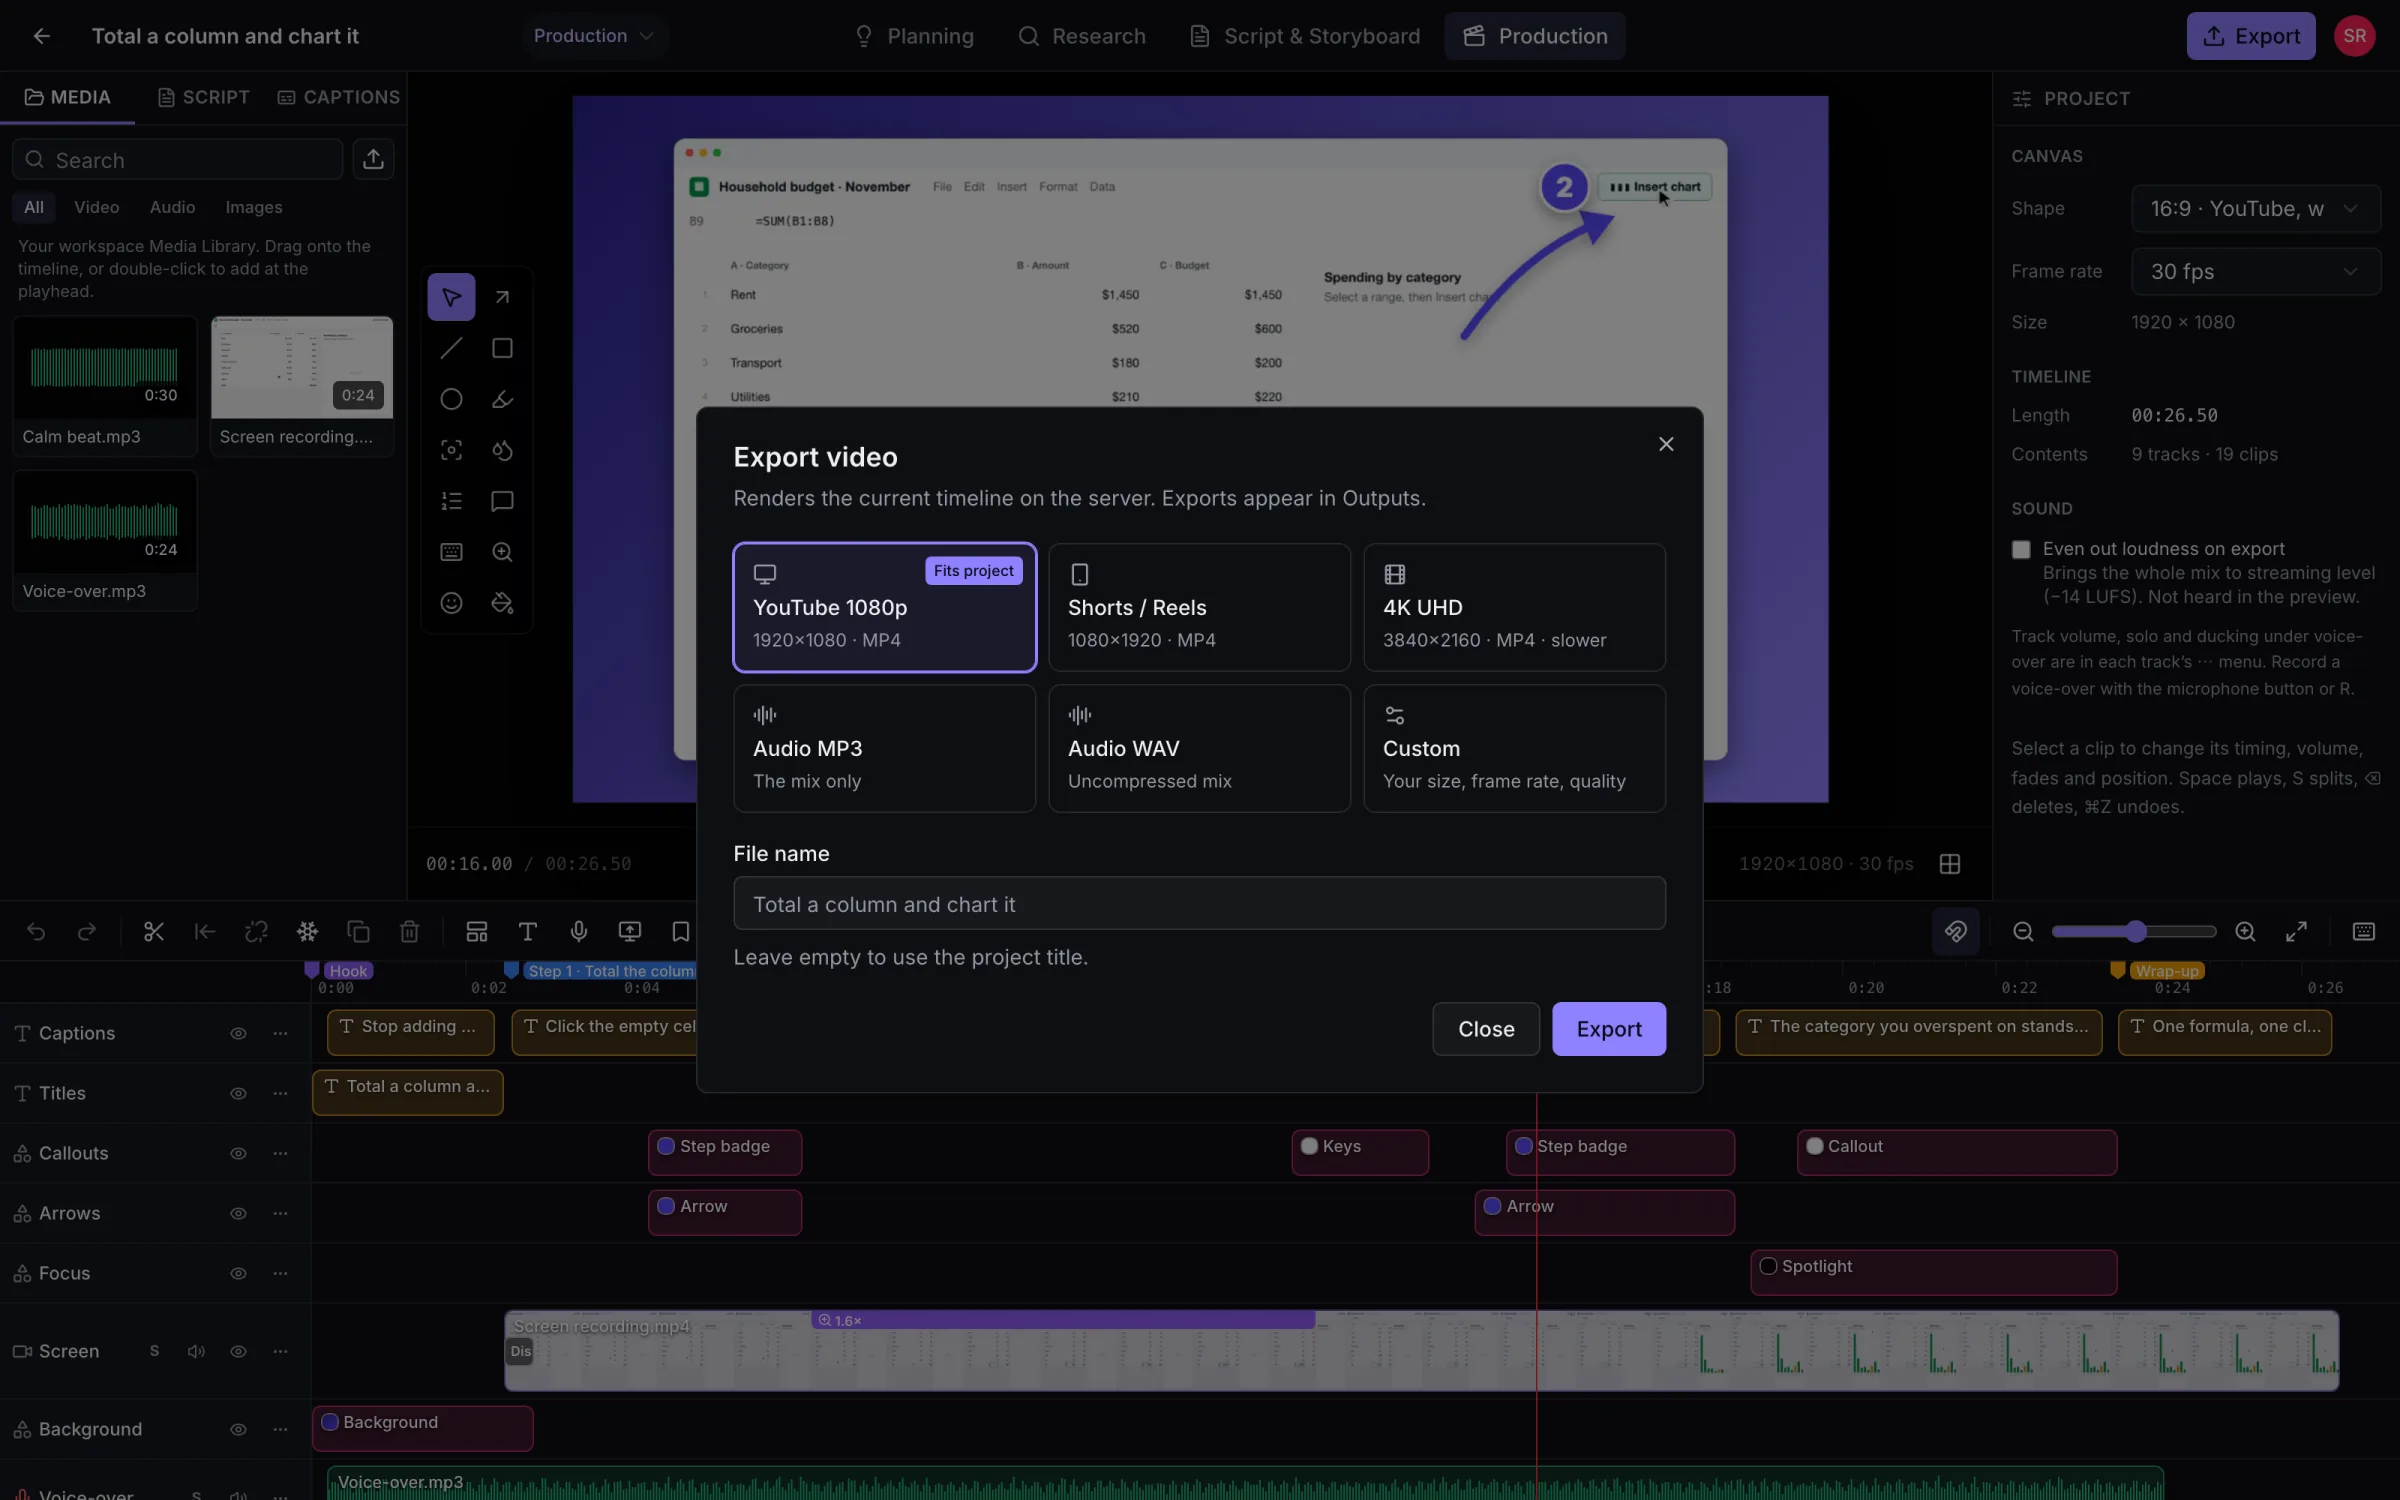
YouTube 1080p
1920×1080 H.264 MP4 with AAC audio.
Shorts and Reels
Vertical 1080×1920 at 9:16.
4K UHD
3840×2160 for the sharpest screen text.
Audio only
MP3 for podcasts, WAV for further editing.
Custom
Your own size and a high, standard or small quality setting.
Export a range
Set in and out points with I and O to export only part of the timeline.
Make videos with your team in one shared place.
On the Team plan, projects and media live in a shared workspace, so nothing is stuck on one person’s laptop.
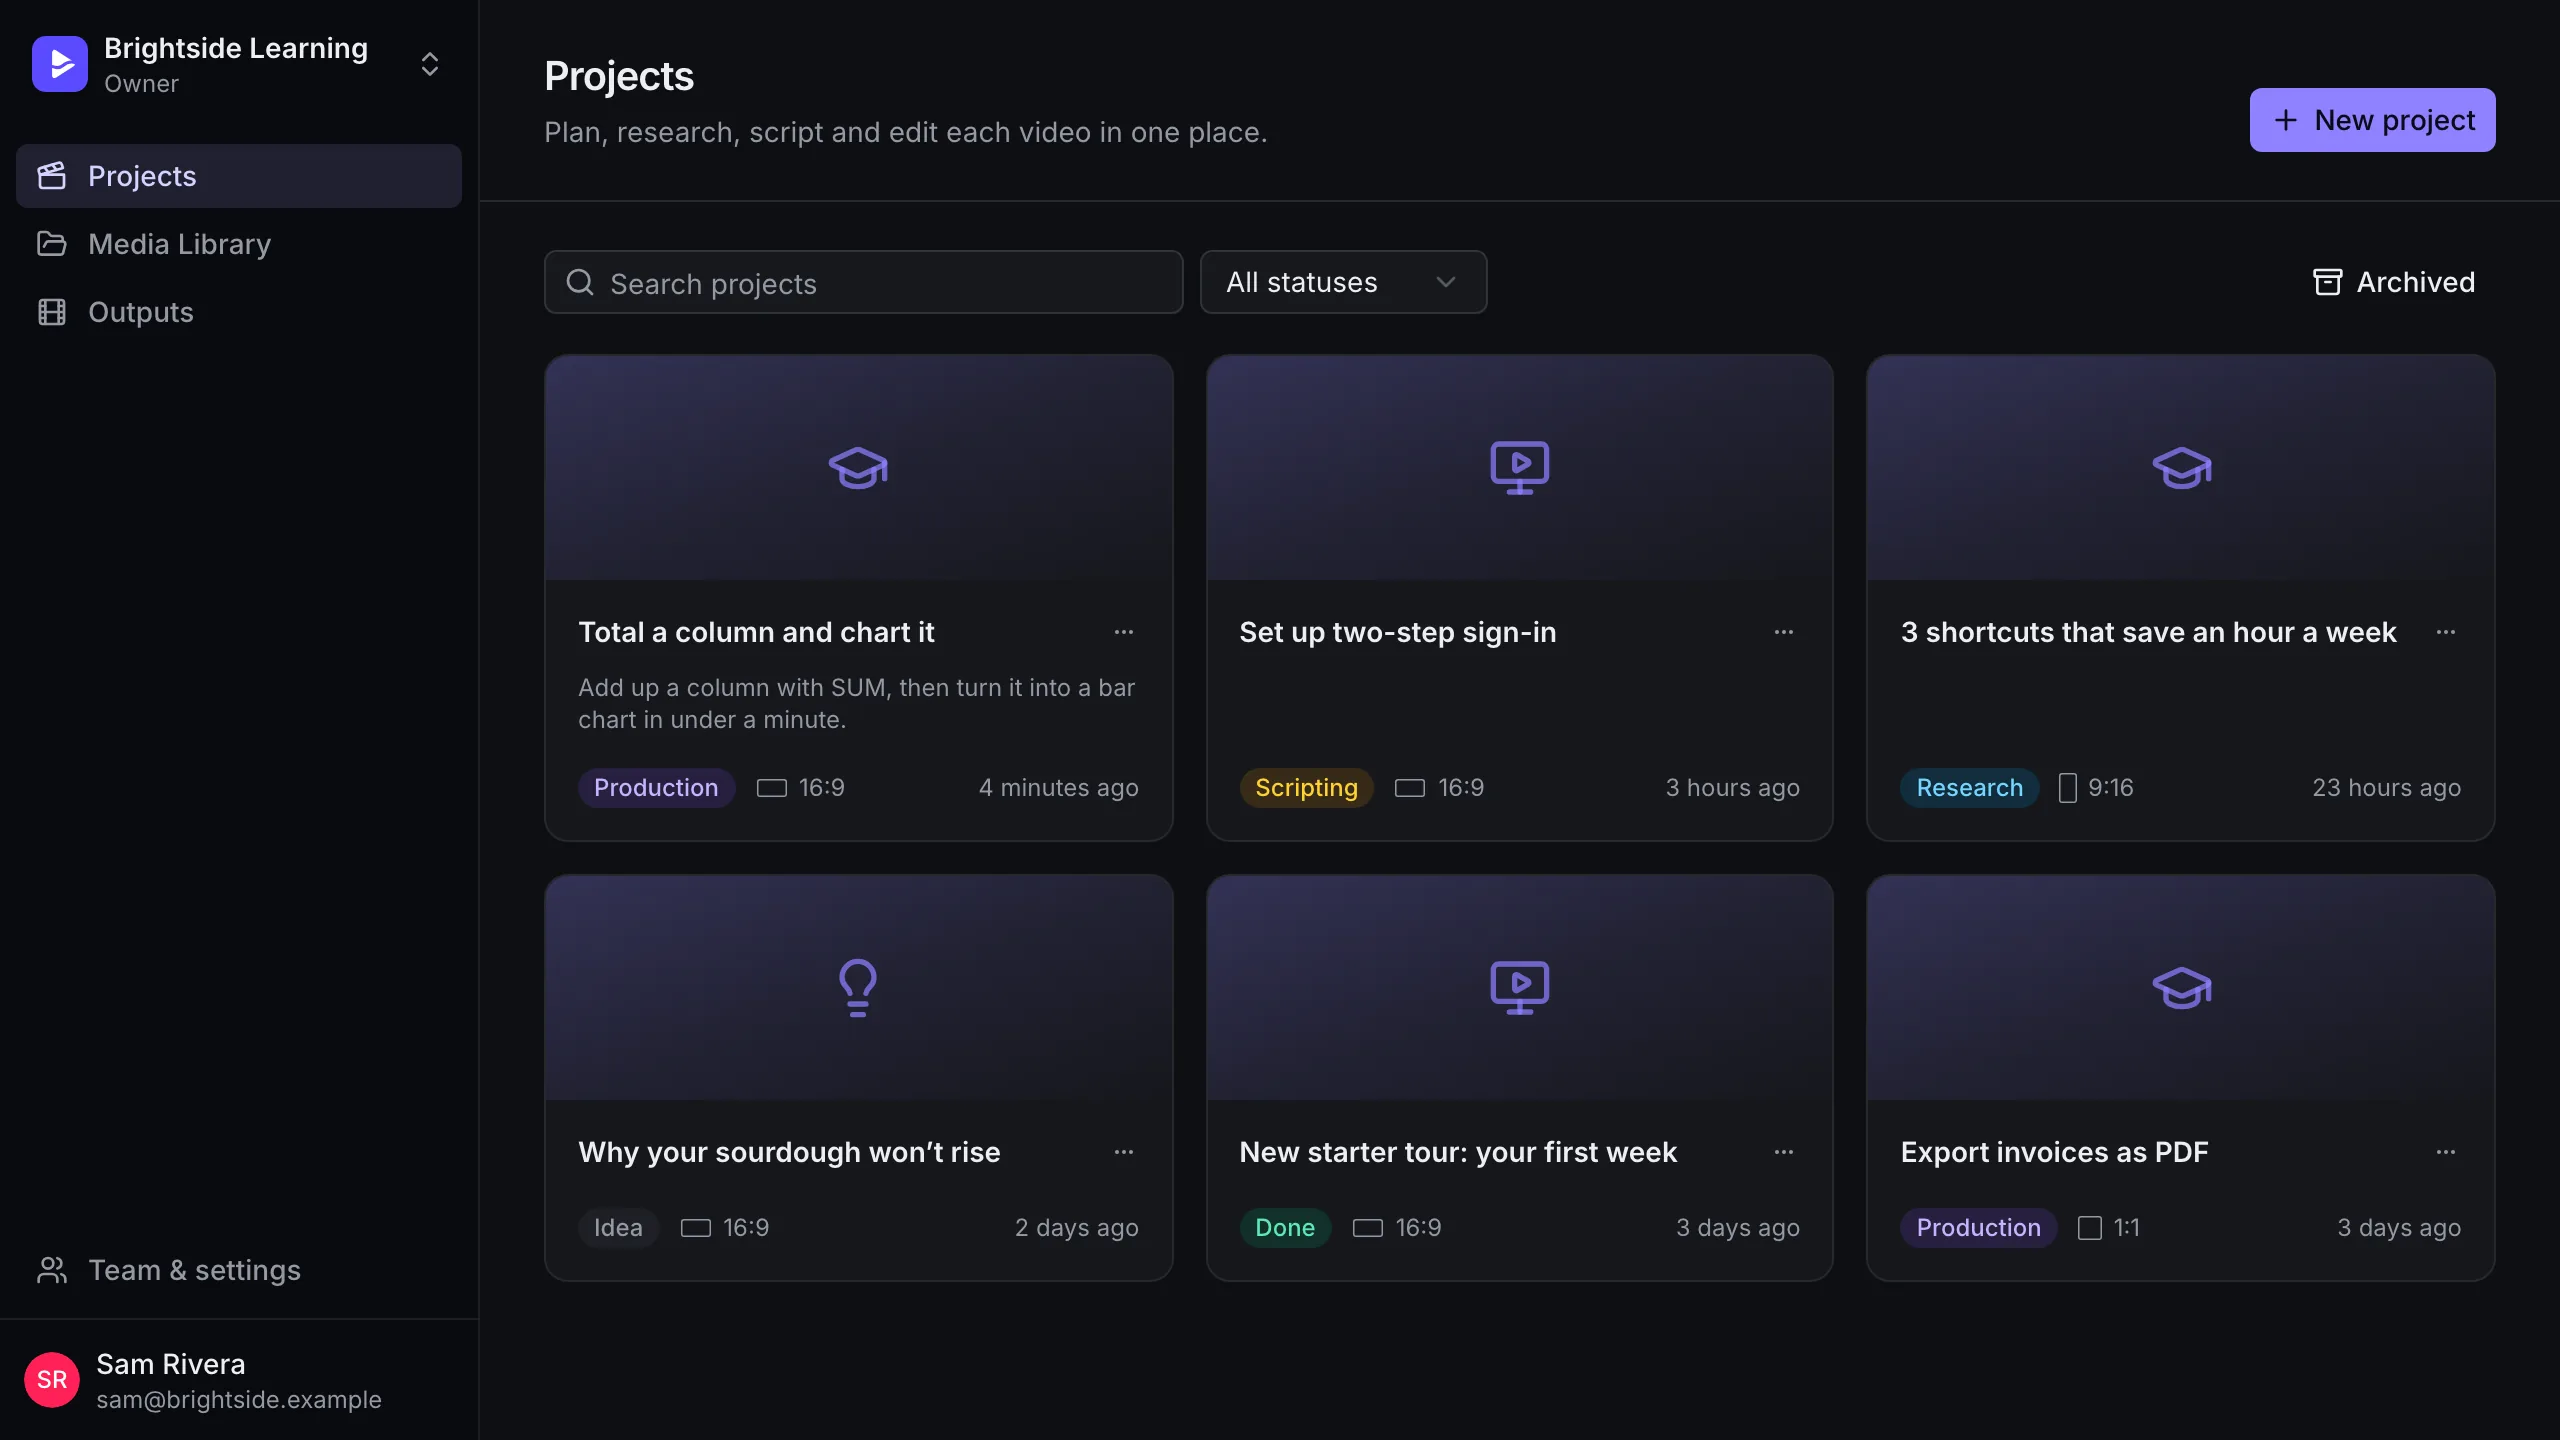
Workspaces
A personal workspace on first sign-in, and as many shared ones as you need.
Roles
Owner, admin, editor and viewer.
Invitations
Invite by email. New people join in one step.
Shared library
One media library per workspace, used by every project in it.
Aeflow sign-in
Email codes or Google, through your Aeflow account.
Safe saves
Timelines autosave with versioning, so one save can’t quietly overwrite another.
Your hands stay on the keyboard.
A dozen of the shortcuts in the editor. Press ? inside it for the full list.
- Space
- Play / pause
- J K L
- Shuttle back, stop, forward
- S
- Split at the playhead
- ⇧⌫
- Ripple delete
- Z
- Zoom into an area
- A
- Arrow
- N
- Numbered step badge
- H
- Highlight
- T
- Add text
- R
- Record voice-over
- M
- Add a marker
- F
- Freeze frame
Made for what you’re making
Tutorials & software guides
Record your screen, zoom in and point at what matters.
Learn moreExplainer videos
Shapes, scenes and voice-over on a blank canvas.
Learn moreYouTube creators
Research, script and edit, then export for long-form and Shorts.
Learn moreTeams
Shared workspace, media library and roles.
Learn moreMake your next tutorial clearer, and faster.
Record your screen, point at what matters and export a finished video. Try every feature free for 14 days.
Questions first?
Every feature included · Runs in your browser · Cancel any time